Laravel 5.8 – Dusk Chrome Driver and Chrome Browser must be the same

I was setting up dusk for browser testing and ran into an issue that was causing an error when I ran tests.

session not created: This version of ChromeDriver only supports Chrome version 75

If you want to run a different version of Chrome you may specify the Chrome Driver with its artisan command.

php artisan dusk:chrome-driver 74

The Chrome browser and Dusk Chrome Driver must be the same.

How to access Phpmyadmin from Lightsail instance.

How To Access PhpMyAdmin?

For security reasons, phpMyAdmin is accessible only when using 127.0.0.1 as the hostname. To access it from a remote system, you must create an SSH tunnel that routes requests to the Web server from 127.0.0.1. This implies that you must be able to connect to your server over SSH in order to access these applications remotely.

IMPORTANT: Before following the steps below, ensure that your Web and database servers are running.
NOTE: The steps below suggest using port 8888 for the SSH tunnel. If this port is already in use by another application on your local machine, replace it with any other port number greater than 1024 and modify the steps below accordingly. Similarly, if you have enabled Varnish, your stack’s Web server might be running on port 81. In this case, modify the steps below to use port 81 instead of port 80 for the tunnel endpoint.

Accessing PhpMyAdmin On Windows

Watch the following video to learn how to easily access phpMyAdmin on Windows through an SSH tunnel:

In order to access phpMyAdmin via SSH tunnel you need an SSH client. In the instructions below we have selected PuTTY, a free SSH client for Windows and UNIX platforms. The first step is having PuTTY configured. Please, check how to configure it in the section how to connect to the server through SSH using an SSH client on Windows.

Once you have your SSH client correctly configured and you tested that you can successfully access to your instance via SSH, you need to create an SSH tunnel in order to access phpMyAdmin. For doing so, follow these steps:

  • In the “Connection -> SSH -> Tunnels” section, add a new forwarded port by introducing the following values:
    • Source port: 8888
    • Destination: localhost:80

    This will create a secure tunnel by forwarding a port (the “destination port”) on the remote server to a port (the “source port”) on the local host (127.0.0.1 or localhost).

  • Click the “Add” button to add the secure tunnel configuration to the session. (You’ll see the added port in the list of “Forwarded ports”).
  • In the “Session” section, save your changes by clicking the “Save” button.
  • Click the “Open” button to open an SSH session to the server. The SSH session will now include a secure SSH tunnel between the two specified ports.
  • Access the phpMyAdmin console through the secure SSH tunnel you created, by browsing to http://127.0.0.1:8888/phpmyadmin.
  • Log in to phpMyAdmin by using the following credentials:
    • Username: root
    • Password: application password that was just set or if you don’t know or can’t remember.
      cat /opt/bitnami/var/data/bitnami_credentials/credentials
      

Here is an example of what you should see:

If you are unable to access phpMyAdmin, verify that the SSH tunnel was created by checking the PuTTY event log (accessible via the “Event Log” menu):

Original source

Upgrade to the latest PHP or the latest LAMP stack within the Lightsail AWS service?

When you spin up a new instance on AWS Lightsail and use the LAMP stack the PHP version is 5.6. Booooo

The only way to update PHP is to upgrade the LAMP stack through Bitnami.

Follow these steps:

  • Access the machine using SSH.  This will log you into /home/bitnami.
  • Create a backup of the database if you have information there

https://docs.bitnami.com/aws/components/mysql/#how-to-create-a-database-backup4

  • Stop the current services and move the current installation folder
sudo /opt/bitnami/ctlscript.sh stop
sudo mv /opt/bitnami /opt/bitnami.back


Get the latest version url from this link. Right click on the link and “copy link as”. Subsitute that link for the one below in the wget line.

wget "https://bitnami.com/redirect/to/237356/bitnami-lampstack-7.1.19-0-linux-x64-installer.run"
chmod +x ./bitnami-lampstack-7.1.16-0-linux-x64-installer.run
sudo ./bitnami-lampstack-7.1.16-0-linux-x64-installer.run


  • Install this stack at /opt/bitnami and set your preferred password
  • Restore the database backup if you created it before

https://docs.bitnami.com/aws/components/mysql/#how-to-restore-a-database-backup

  • Migrate your php files and any configuration change you made from the old installation /opt/bitnami.back to the new one /opt/bitnami
  • Restart Apache (if you modified the default configuration)
sudo /opt/bitnami/ctlscript.sh restart apache


  • Check that everything works as expected

Original source

Laravel conditional for @extends in blade

I have a Laravel app that has multiple users.  Depending on the user I need to display a different blade template.  The problem is that it is not possible to use a regular

@if($role == $something)
  @extends('layout.app')
@else
  @extends('layout.other')
@endif

After much searching I found that @extends is required to be on the first line so it is possible to have a conditional if you do it this way.

@extends($var ? 'layout.app' : 'layout.other')

Hope this saves you some time.

Laravel AWS s3 file storage – IAM users and Permissions

This seemed easy with Laravel 5.4 supporting s3 disks but it took a bit of setting up and a lot of trial and error so this is what is needed to get it working.

  1. Setting Laravel up to use s3

Ensure that you follow the docs and add flysystem to your composer.json.

"league/flysystem-aws-s3-v3": "~1.0"

Then update composer.

composer update

2. Sign up for AWS

3. Create your first bucket.

There are 4 steps to creating a bucket.

Add a unique bucket name and choose a region.

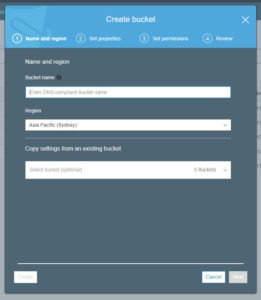
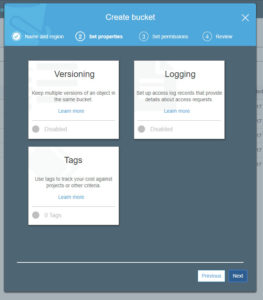
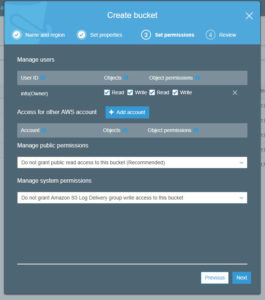
Nothing to change or add on this screen or up to step 4. Just click next on each.

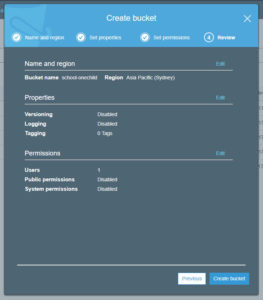
Your bucket will now be added to the system.

4. Create a IAM user with the right permissions.

Click on services in the top bar and then click on IAM.

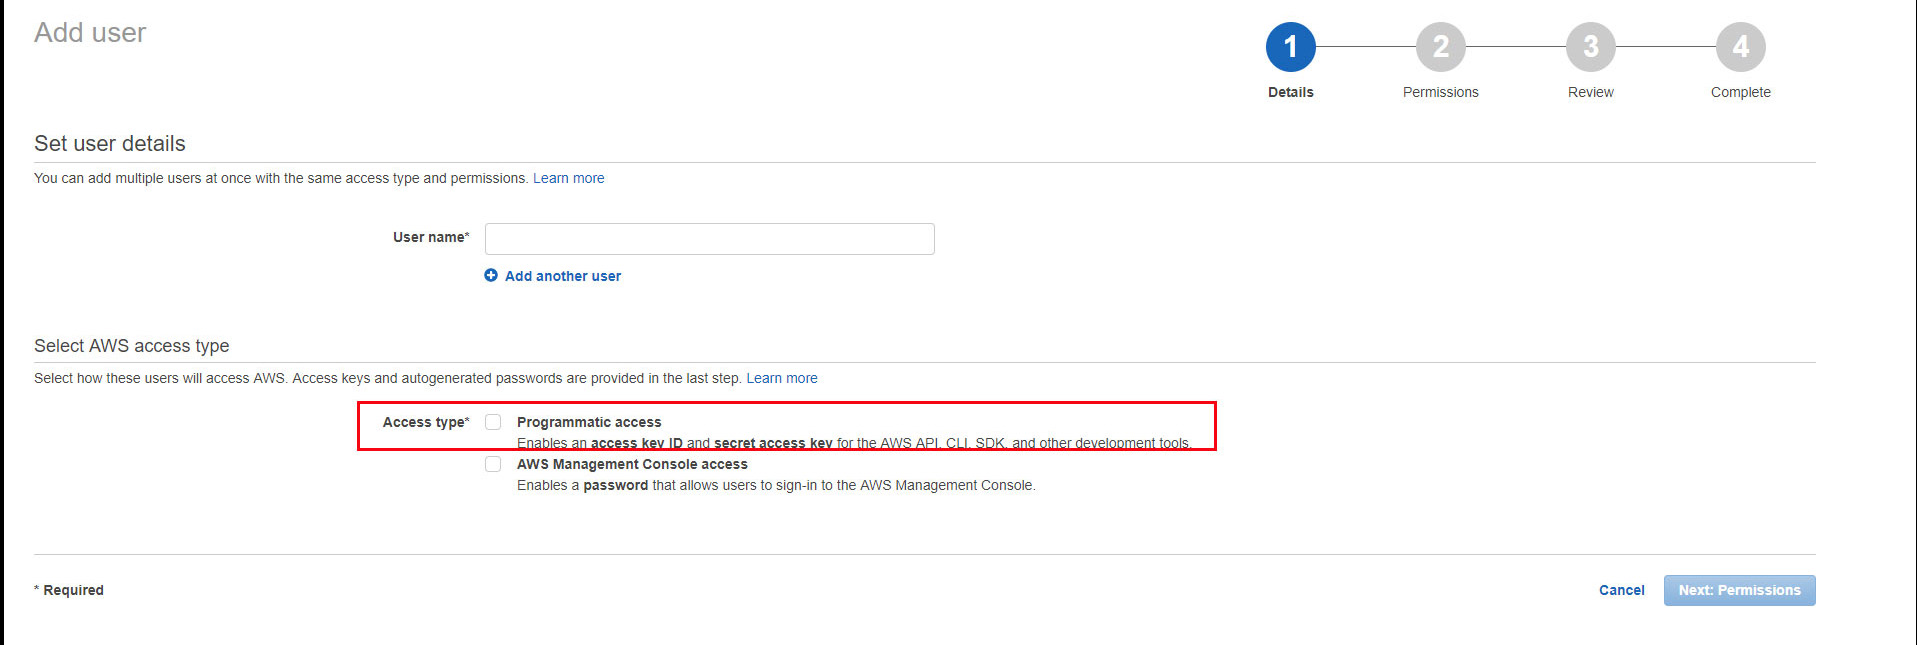
On the IAM screen click on users and then add user.

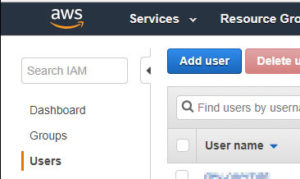
Add a user name and tick the programmatic access. Click next.

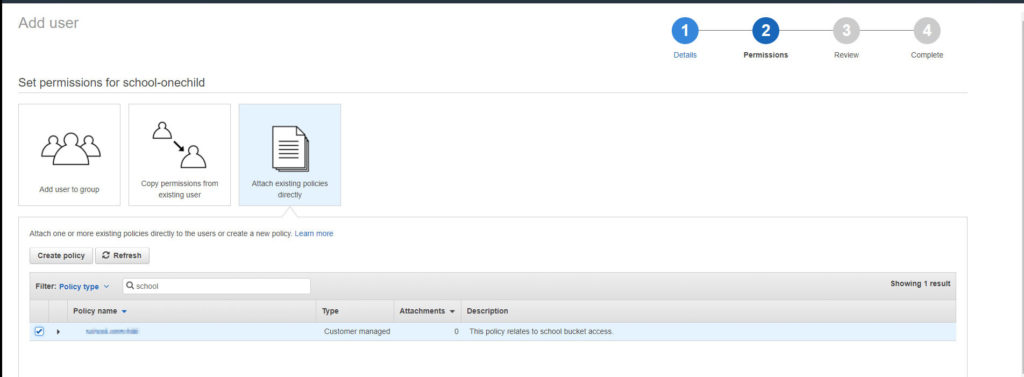
Click on the ‘Attach Policies’ and then ‘Create Policy’.

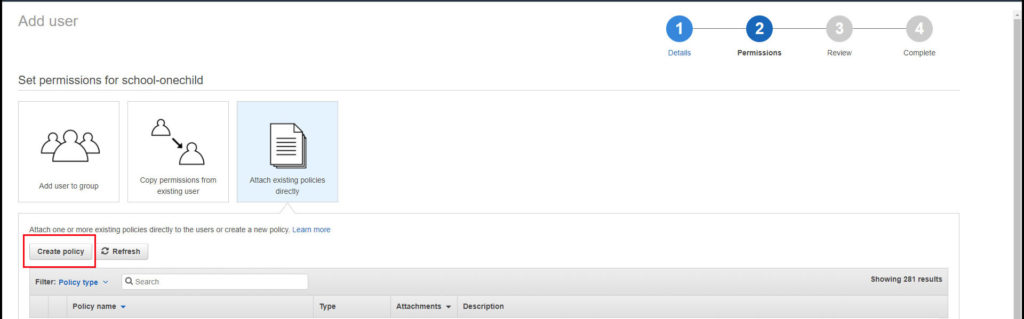
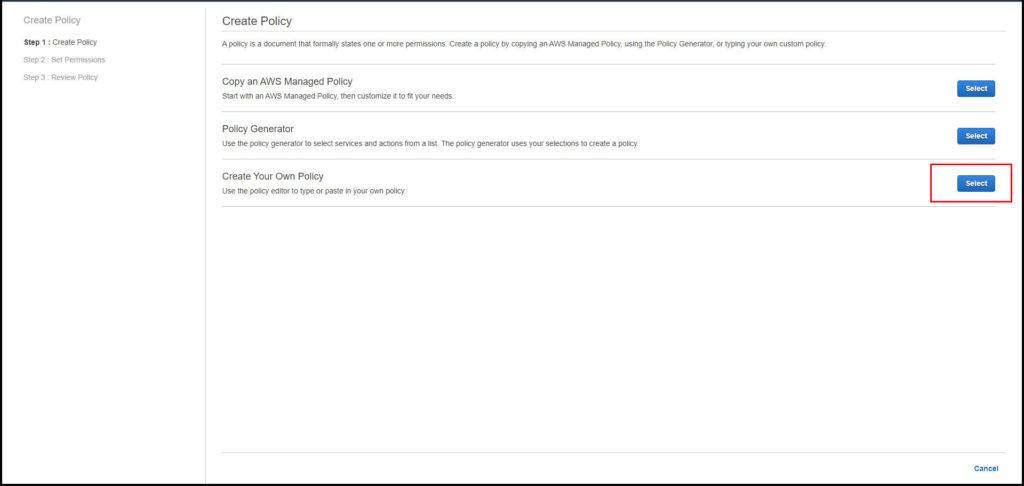
A new tab will open (remember that as we will be coming back to the above page shortly. Click on the select button for ‘Create your own policy’.

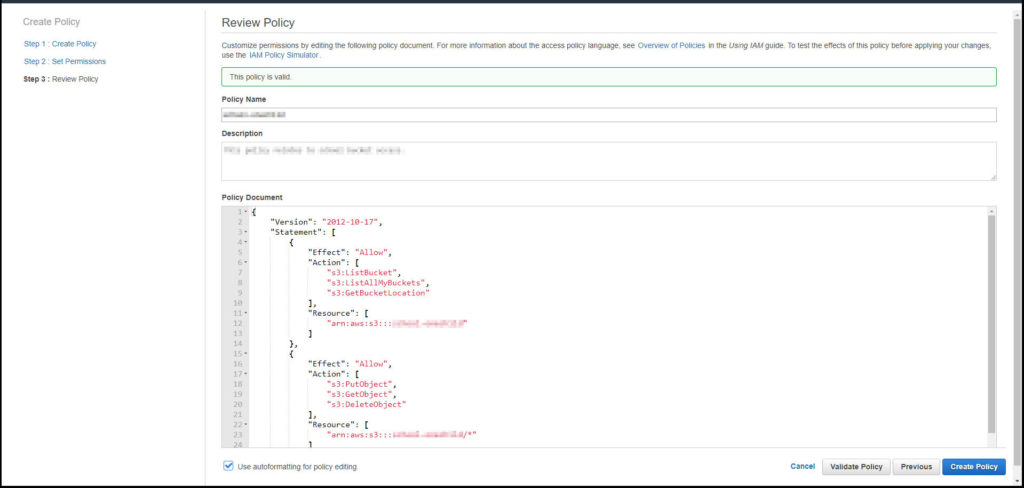
To add a policy copy the code below exactly and do not change the date for the version. Make sure you do change the ‘bucket-name’ in two locations to your buckets name which you just created.

Use Amazon S3 with Laravel 5

{
    "Version": "2012-10-17",
    "Statement": [
        {
            "Effect": "Allow",
            "Action": [
                "s3:ListBucket",
                "s3:ListAllMyBuckets",
                "s3:GetBucketLocation"
            ],
            "Resource": [
                "arn:aws:s3:::bucket-name"
            ]
        },
        {
            "Effect": "Allow",
            "Action": [
                "s3:PutObject",
                "s3:GetObject",
                "s3:DeleteObject"
            ],
            "Resource": [
                "arn:aws:s3:::bucket-name/*"
            ]
        }
    ]
}

Check the policy and then click on create if all is good.

Go back to the previous tab we talked about earlier not to forget. Find the policy that you just made.  You should click on the refresh button first then you may need to use the search so just start typing the policy name.  Tick the checkbox next to the policy you just created and click next down the bottom right.
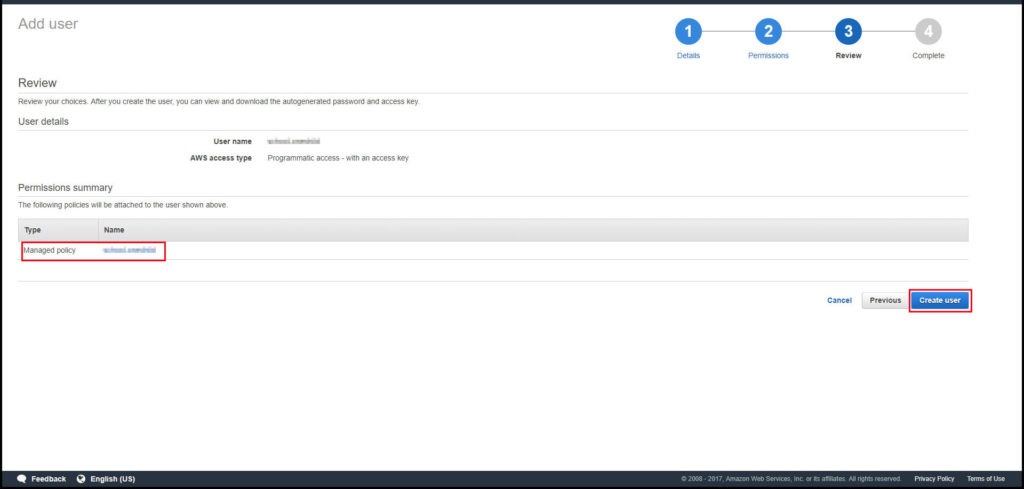
Create the user.

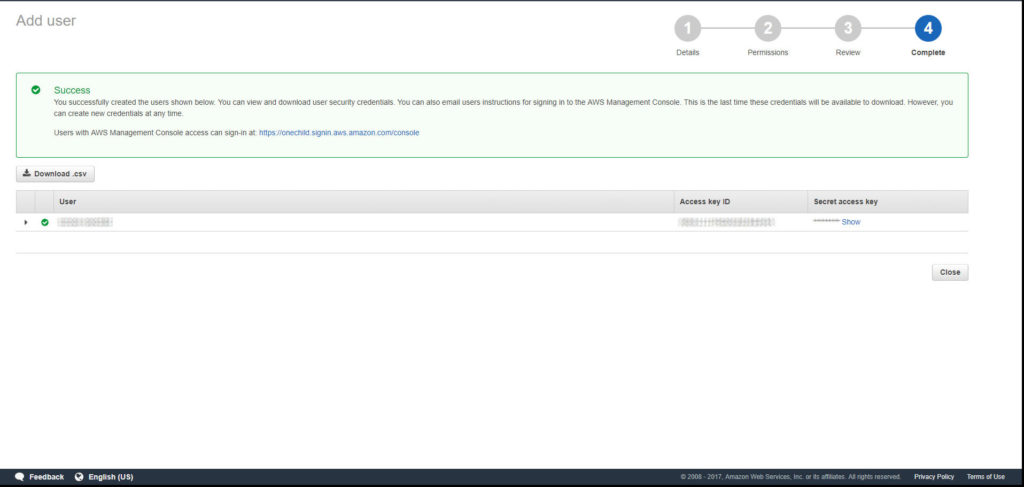
This is the newly created user.  It is VERY IMPORTANT to copy the key and secret key down here.  You will not be able to access it at any other time.

Done the bucket and the user has been added to AWS s3 now.  You can start to store files here now.

5. Adding Bucket to Laravel

IN you .env file add this to the bottom of the page.

S3_KEY=XXXXXXXXXXXXXXX
S3_SECRET=XXXXXXXXXXXXXXXXXXXXXXXXXXXXX
S3_REGION=XX-XXXXXXX-XX
S3_BUCKET=your-bucket

In your config/filesystems.php

in disks change to refer to your .env file.  This keeps the access keys out of your version control.

's3' => [
            'driver' => 's3',
            'key' => env('S3_KEY'),
            'secret' => env('S3_SECRET'),
            'region' => env('S3_REGION'),
            'bucket' => env('S3_BUCKET'),
        ],

You can also change the default disk to ‘s3’ if that suits you.

Why are my images not showing up?

In AWS s3 a buckets contents are private and cannot be accessed from a website or even with a direct url.  Laravel allows you to individually set permission for files which are saved to s3.  If you would like to allow all images to be visible from you bucket you can set permission for the bucket in AWS.  By doing this you will be able to show images on your website which are stored in your bucket.  This also means that you do not need to specify in your project for each file.

In AWS go to s3 and click on your bucket.

Click on permission on the top tab. Click on Bucket policy. Add the code snippet below and save.

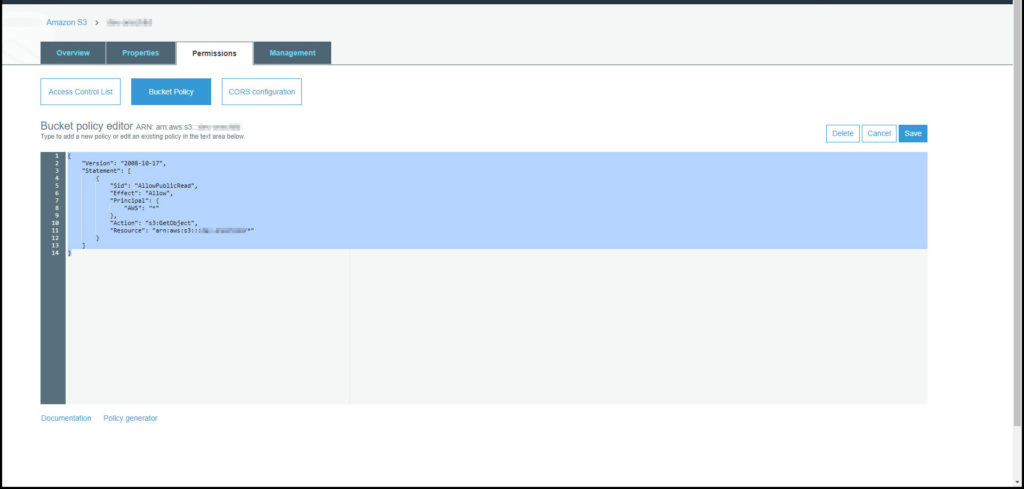
This article helped and provided the code below. Of course change the ‘your bucket’ to the name of your bucket. Click on save.

{
    "Version": "2008-10-17",
    "Statement": [
        {
            "Sid": "AllowPublicRead",
            "Effect": "Allow",
            "Principal": {
                "AWS": "*"
            },
            "Action": "s3:GetObject",
            "Resource": "arn:aws:s3:::your-bucket/*"
        }
    ]
}

Saving files.

However you have your upload set up here are a few tips.

I am using intervention to assist with my file uploads.  So in your code mine is a service class I use for uploads but yours might just be in your Model or controller.

This article helped

$saved = Image::make($file)->resize($imageSize, null, function ($constraint)
        {
            $constraint->aspectRatio();
            $constraint->upsize();
        })->orientate();

        $newImage = $saved->stream();

        Storage::disk('s3')->put($path . $name, $newImage->__toString());

        return $saved;

The important parts here are the stream() and then the __toString().

Dont forget to include Storage facade in your code e.g.

use Illuminate\Support\Facades\Storage;

That is about it . You have all the elements to make this work.

If you are having problems getting this to work locally check out my trouble uploading to s3 from local

Trouble uploading images to AWS s3 and XAMPP

So I needed to get my local xampp development site working with AWS s3 to store images.  I had it set up and working on my development server but I needed my local development to work as well. Unfortunately I kept getting this error.

Aws\S3\Exception\S3Exception with message ‘Error executing “ListObjects” on “https://mybucket.s3-ap-southeast-2.amazonaws.com/?prefix=&delimiter=%2F&encoding-type=url”; AWS HTTP error: cURL error 60: SSL certificate problem: unable to get local issuer certificate (see http://curl.haxx.se/libcurl/c/libcurl-errors.html)’

I Googled for a solution and everywhere I found that I needed to change my php.ini file to include a certificate. Unfortunately everywhere told me to get a clean cacert.pem and do the following in the php.ini file.

curl.cainfo=C:\path\to\cert\cacert.pem

This did not work for me.  More searching and a bit of trial and error lead me to this.

openssl.cafile=C:\path\to\cert\cacert.pem

And badda-bing badda-boom it works!

Hope this helps someone save some hours.

Laravel Dom PDF issues with font awesome and a Unicode work around

So I am using Laravel-DomPDF by Barryvdh in my Laravel 5.4 project, which makes it super easy to create PDF documents from Laravel Views.

Kudos to Barryvdh for providing a simple way to produce PDF documents from Laravel.

So, I wanted to pull Font Awesome into the blade view for a couple of icons I had on the page.  Problem was that it was not working.  I tried everything suggested from full url for the link, to adding a fonts folder to /storage/app.  None worked for me.

As I only need a tick and an exclamation on the page I decided to add the styles straight into the head of my blade file and use Unicode.

I found that Dom PDF already pulls in DeJaVu Fonts which is a project that is aiming for complete coverage of alphabetic scripts. The other thing is that it has a bunch of symbols.  Not as awesome as Font Awesome but enough for my needs.

In between the head tags I added this.

<style>
.fa-check:before {
            font-family: DejaVu Sans;
            content: "\2611";
            color:darkgreen;
            font-size:1.2rem;
}
.fa-exclamation-triangle:before{
            font-family: DejaVu Sans;
            content: "\26A0";
            color:darkorange;
            font-size:1.2rem;
 }
</style>

This is the check:

And this is the exclamation:

Neat hey! Where did I get the content:”\????” from?

Miscellaneous_Symbols

This was a quick and dirty solution to my issue and may help you.  While I agree it’s not ideal it is better than changing to another PDF project or spending more time trying to get this to work with Font Awesome at the moment.

Laravel event handler for last login

I recently needed to show on the admin side of an app the last login of all users and if they had logged in at all.  I also wanted to show the user the last time that they visited the site.  I used event handlers for both these tasks.

Update the Users Table

I have used the user model to store a timestamp for each event, so I added two new rows to my users table.  I will then be able to access these easily in my blade template.

$table->timestamp('latest_login')->nullable();
$table->timestamp('previous_visit')->nullable();

On the user model I also added both timestamps to the proteced $dates array. By doing this I will be able to use ‘Carbon’ helpers like ‘diffForHumans’.

protected $dates = [
        'created_at',
        'updated_at',
        'latest_login',
        'previous_visit'
    ];

Creating the Event Handlers:

On the admin side I used the login event and for the user I used the logout event to record the current time and date to the users table.

In the EventServiceProvider service provider (app/Providers/EventServiceProvider.php) I added the following to the $listen array:

'Illuminate\Auth\Events\Login' => [
    'App\Listeners\Users\LatestLogin',
],
'Illuminate\Auth\Events\Logout' => [
    'App\Listeners\Users\PreviousLogin',
],

I then ran php artisan event:generate. This command then creates two event listeners located at app\Listeners\Users\LatestLogin and app\Listeners\Users\PreviousLogin.

Each event listener’s handle()method I added the following.  

public function handle(Login $event)
    {
        $event->user->latest_login = Carbon::now();
        $event->user->save();
    }
 public function handle(Logout $event)
    {
        $event->user->previous_visit = Carbon::now();
        $event->user->save();
    }

I also added:

use Carbon\Carbon;

to each listener.

Now when a user logs in or logs out the event listener fires and updates the appropriate row of the users table for the user.

Blade

Finally for completeness in my blade file I can call:

{{ $user->latest_login->diffForHumans() }}

And it will output something like – 1 hour ago – or however long it was since the user signed in.

For the user in the view I add:

Last Visit: {{ Auth::user()->previous_visit->diffForHumans() }}

It outputs something like: Last Visit: 2 days ago

That is about it. I hope this helps someone else out.