How To Access PhpMyAdmin?
For security reasons, phpMyAdmin is accessible only when using 127.0.0.1 as the hostname. To access it from a remote system, you must create an SSH tunnel that routes requests to the Web server from 127.0.0.1. This implies that you must be able to connect to your server over SSH in order to access these applications remotely.
| IMPORTANT: Before following the steps below, ensure that your Web and database servers are running. |
| NOTE: The steps below suggest using port 8888 for the SSH tunnel. If this port is already in use by another application on your local machine, replace it with any other port number greater than 1024 and modify the steps below accordingly. Similarly, if you have enabled Varnish, your stack’s Web server might be running on port 81. In this case, modify the steps below to use port 81 instead of port 80 for the tunnel endpoint. |
Accessing PhpMyAdmin On Windows
Watch the following video to learn how to easily access phpMyAdmin on Windows through an SSH tunnel:
In order to access phpMyAdmin via SSH tunnel you need an SSH client. In the instructions below we have selected PuTTY, a free SSH client for Windows and UNIX platforms. The first step is having PuTTY configured. Please, check how to configure it in the section how to connect to the server through SSH using an SSH client on Windows.
Once you have your SSH client correctly configured and you tested that you can successfully access to your instance via SSH, you need to create an SSH tunnel in order to access phpMyAdmin. For doing so, follow these steps:
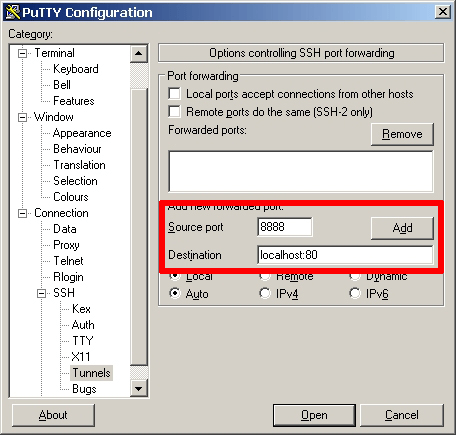
- In the “Connection -> SSH -> Tunnels” section, add a new forwarded port by introducing the following values:
- Source port: 8888
- Destination: localhost:80
This will create a secure tunnel by forwarding a port (the “destination port”) on the remote server to a port (the “source port”) on the local host (127.0.0.1 or localhost).
- Click the “Add” button to add the secure tunnel configuration to the session. (You’ll see the added port in the list of “Forwarded ports”).
- In the “Session” section, save your changes by clicking the “Save” button.
- Click the “Open” button to open an SSH session to the server. The SSH session will now include a secure SSH tunnel between the two specified ports.
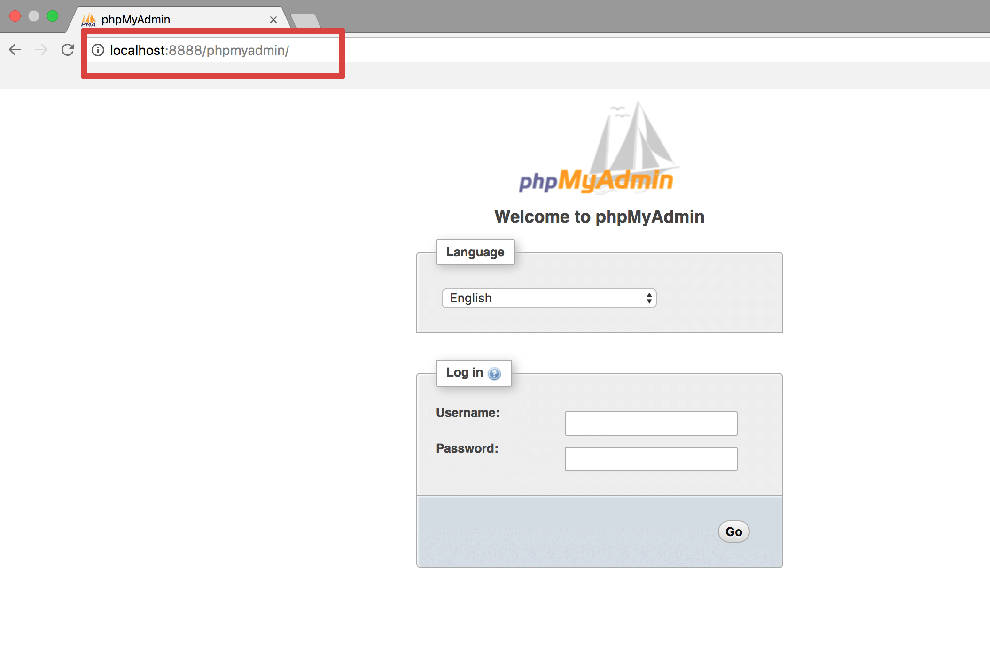
- Access the phpMyAdmin console through the secure SSH tunnel you created, by browsing to http://127.0.0.1:8888/phpmyadmin.
- Log in to phpMyAdmin by using the following credentials:
- Username: root
- Password: application password that was just set or if you don’t know or can’t remember.
cat /opt/bitnami/var/data/bitnami_credentials/credentials
Here is an example of what you should see:
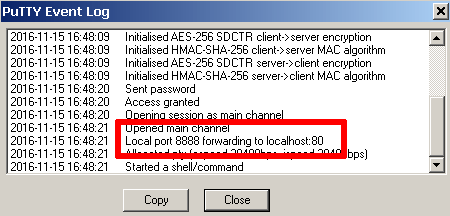
If you are unable to access phpMyAdmin, verify that the SSH tunnel was created by checking the PuTTY event log (accessible via the “Event Log” menu):